
YouTube Audio Settings on Mac: Check LUFS, True Peak and Volume
Check your full video mix, understand the -14 LUFS reference and raise quiet audio only when the peaks have room.
In this article
Good YouTube audio starts with a voice people can understand, consistent levels and enough room for loud moments. A video can meet an export specification and still contain distracting noise, buried narration or a sudden blast of music. Checking both the sound and the measurements is the useful final step.
For an ordinary YouTube upload, use 48 kHz audio, listen to the complete mix and check integrated loudness alongside true peak. Around -14 LUFS is a useful reference for comparing a finished mix, while -1 dBTP is a practical ceiling that leaves headroom. Neither number is a strict YouTube upload requirement.
This guide explains those measurements, shows how to use the YouTube audio check in ZXN Studio on Mac and describes a separate audio workflow in Audacity. It focuses on uploaded videos, not live-stream encoder settings.
Know what the numbers actually measure
Integrated LUFS describes perceived loudness over the measured programme. It helps compare a complete tutorial with another complete tutorial more usefully than looking only at the loudest waveform spike. A reading of -22 LUFS is quieter than -14 LUFS. The less negative number represents more loudness.
True peak, measured in dBTP, estimates the highest level of the reconstructed audio signal. It helps reveal peaks that a simple sample-peak reading can miss. A mix can have quiet average loudness while one click, laugh or drum hit already leaves very little peak headroom.
These two readings answer different questions. LUFS helps you judge overall level. True peak helps you judge how much room remains for the loudest moments. Neither tells you whether a microphone is muffled, the music obscures speech or the recording contains a distracting echo. Those require listening.
Use YouTube references without treating them as upload gates
Google’s upload encoding recommendations specify 48 kHz audio and list AAC-LC and Opus among the codecs. The recommended stereo audio bitrate is 384 kbps. Those are recommendations for preparing uploads, rather than a rule that every different bitrate is rejected.
The often-quoted -14 LUFS reference comes from loudness-normalization practice. iZotope’s streaming loudness discussion lists that reference for YouTube and explains why leaving true-peak headroom matters for lossy encoding. Google’s upload page does not present -14 LUFS as an acceptance threshold.
Aim for a clear, balanced video rather than forcing every programme to land on exactly the same decimal. A quiet explanation and a dramatic music sequence can have different needs. If reaching a target would make the sound harsh or destroy its dynamics, reconsider the mix instead of chasing the meter.
1. Finish the balance before measuring
Set the relative levels of narration, music and any screen or camera audio first. Listen to a quiet sentence, a normal passage and the loudest moment. The speaker should remain intelligible throughout, including when music enters or the camera angle changes.
Reduce music where it competes with important words. Correct a single loud clip at that clip, rather than lowering the entire programme to accommodate it. Check fades and transitions between recordings made with different microphones. Loudness measurement is most informative after these editorial choices have settled.
Your Mac’s speaker volume and the editor’s preview volume affect what you hear during playback. They are not a substitute for changing the exported mix. Keep your listening level comfortable and reasonably consistent while comparing versions, then use the actual audio controls for changes that belong in the file.
2. Run the whole-timeline check in ZXN Studio
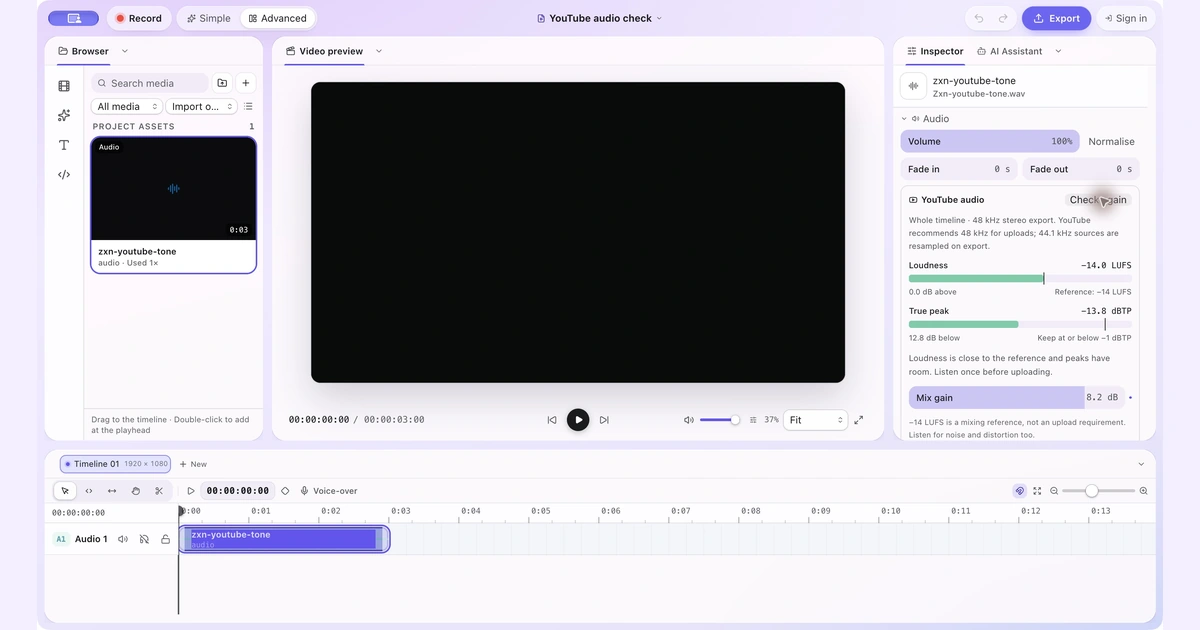
In Simple, select a clip with audio, open Audio → Sound, and find YouTube audio. In Advanced, the same check appears in the selected clip’s Inspector → Audio section. Click Check mix.
Existing 44.1 kHz recordings do not need to be discarded. ZXN Studio resamples those sources to 48 kHz on export.
The check measures the whole timeline, even though you open it from a selected clip. It uses the export audio mixer, including the mix’s edits, fades, speed changes and audio processing. That distinction matters when a quiet voice clip shares a timeline with a much louder introduction.
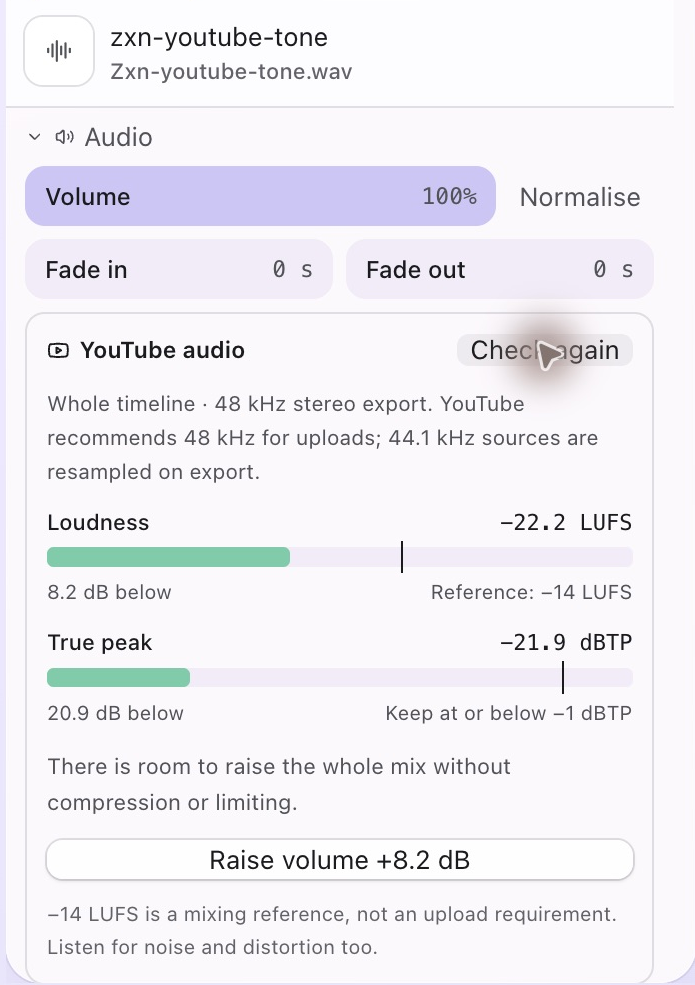
This real app screenshot uses a short test tone to make the before-and-after measurement easy to compare. It demonstrates level adjustment, not a judgment of speech quality.
Read both diagrams. In this example, the mix is 8.2 dB below the loudness reference and has substantial peak headroom. Another recording could show similarly low loudness while its true peak sits close to the ceiling. Those cases should not receive the same adjustment.
3. Raise a quiet mix only when peaks have room
When the measurement shows enough headroom, ZXN Studio offers Raise volume with the proposed increase. This applies a gain change to the whole mix. It preserves the balance between clips and can be undone; it does not rewrite the original media files.
The adjustment is linear gain. It does not compress the loud passages, limit peaks or remove noise. Raising a voice also raises the background noise already mixed with it. If the source is hissy or distorted, an improved number does not make that problem disappear.
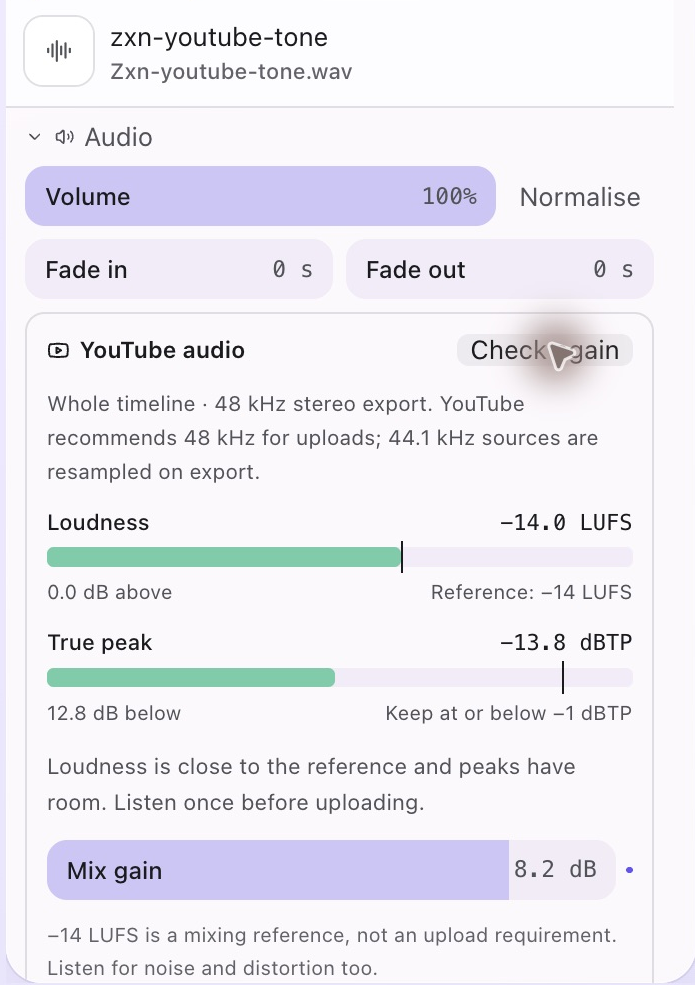
After the offered increase, a new measurement places the test mix at -14.0 LUFS. This particular signal still has ample peak headroom.
If the app does not offer a safe increase, inspect the loudest events and the overall balance. A sharp transient may be using the available headroom. Decide whether to reduce that event, rebalance the material or use deliberate dynamics processing in your audio workflow. A gain control alone cannot make a quiet, highly dynamic mix louder without also raising its peaks.
4. Check again after changes
Run Check again after applying gain or changing the edit. Adding music, muting a track, changing a clip’s volume or shortening a passage can alter the result. The app marks the reading as out of date when the timeline changes, so an earlier measurement should not be treated as a certificate for a later mix.
Listen again as well. The diagrams help answer whether the level is near the reference and whether peaks have space. They do not certify the recording as pleasant or free of distortion. Pay particular attention to transitions, words at the ends of sentences and any effects that change the character of the voice.
5. Check the exported file before uploading
Export a representative sample, then listen to the resulting file outside the editor. For the final video, measure and audition the complete export if you need to confirm its delivered loudness and true peak. Encoding can shift the readings, so a timeline result is not a guarantee of an identical encoded result.
In our test, the mix measured -14.00 LUFS before export, while the exported AAC file measured -13.75 LUFS. The exported true peak remained comfortably below the reference ceiling. That small difference is a reason to check the delivered file, not a reason to keep adjusting a good-sounding mix by tiny amounts.
The tested ZXN Studio MP4 export used 48 kHz stereo AAC at 192 kbps. That matches the sample-rate recommendation but differs from Google’s 384 kbps stereo bitrate recommendation. Do not confuse an app’s current export settings with every value in a platform’s recommendation table. See the exporting guide for the app workflow.
Using Audacity for a separate audio pass
In Audacity, select the audio and open Effect → Volume and Compression → Loudness Normalization. Choose perceived loudness and enter the desired LUFS value. Keep stereo channels linked when you want to preserve their existing balance. Export the processed audio, return it to your video editor and verify the complete final mix. Audacity’s manual explains these options; peak and listening checks are still necessary.
A final listening pass that catches what meters miss
Listen on headphones for clicks, edits and background noise, then on ordinary speakers for speech intelligibility. Watch the opening, the loudest transition and the ending. Make sure the first word is intact, the final sentence is not cut off and no music suddenly overwhelms the voice.
If pacing is still loose, remove unnecessary pauses before taking your final measurement. Once the words are easy to follow, the balance is consistent and the exported file sounds clean, the numbers can serve their intended purpose: helping you make an informed finishing decision.
Related journal notes
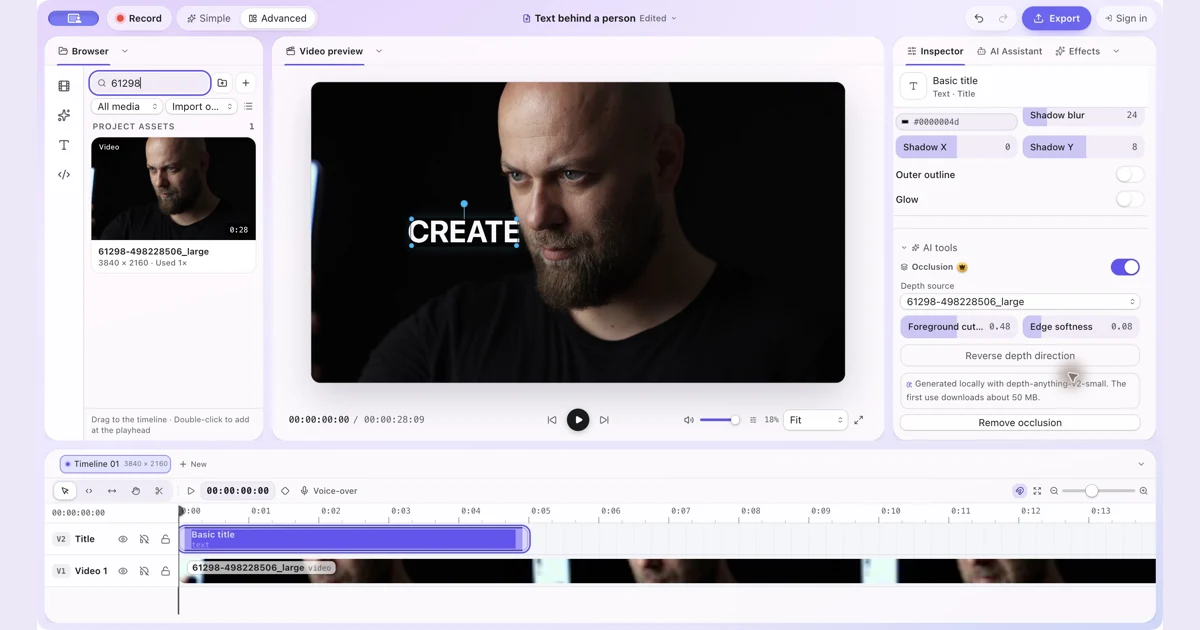 How to Put Text Behind a Person in a Video on MacPut text and other visual items behind a person with manual occlusion in ZXN Studio. Follow the layer setup and refine the depth boundary.
 How to Remove Silence and Long Pauses From a Screen Recording on MacFind quiet gaps, keep useful thinking time and shorten a screen recording without cutting off words or losing sync.
 The ZXN Studio referral programme: earn 30% recommending a screen recorder you already useZXN Studio now pays creators 30% of every lifetime purchase and 20% of monthly payments for a year. Here is how the programme works, who it suits and what it pays.